
Our Campaign Influence Setup Guide
We recently learned about the Pardot Campaign Influence Attribution Model. I know, what you’re thinking.
“What? That’s just a bunch of jargon! What does even that mean?”
Well, it means now you can align your Salesforce and Pardot campaigns. And, in the process, learn more about where your leads are converting by setting up attribution models.
This is worth looking into for anyone who:
-
Wants more data about which marketing efforts influence opportunities (i.e., a lead you originally met through a referral reads one of your recent whitepapers and immediately asks to work with you)
-
Has been frustrated with Salesforce and Pardot having different definitions of “campaign”
These are some of the things that we’ve always wanted with Salesforce and Pardot so we were understandably excited. But when we jumped into the documentation to set this up we immediately became frustrated with the lack of clear instructions. Being Pardot lovers and Salesforce experts, we weren’t going to let this deter us from setting up this amazing reporting feature. So we set out to not only set it up but correctly document our process so you can use this feature too.

Note: you’ll need to have the Additional Campaign Influence Models enabled. If you’ve reached step 6 and noticed this model is not on your screen, contact your Salesforce Account Executive to have it turned on for you so you can enable it.
Prerequisites
Before entering down this path we recommend that your organization be using these items in order to see value:
-
Salesforce Leads
-
Salesforce Opportunities
-
Salesforce Campaigns and Parent Campaigns
-
Pardot Campaigns
Setting up Customizable Campaign Influence in Salesforce
For the bulk of this documentation, we’ll be following these instructions from Salesforce. We’ll note if we begin to reference other sources.
Step 1: Navigate to Setup in Salesforce.
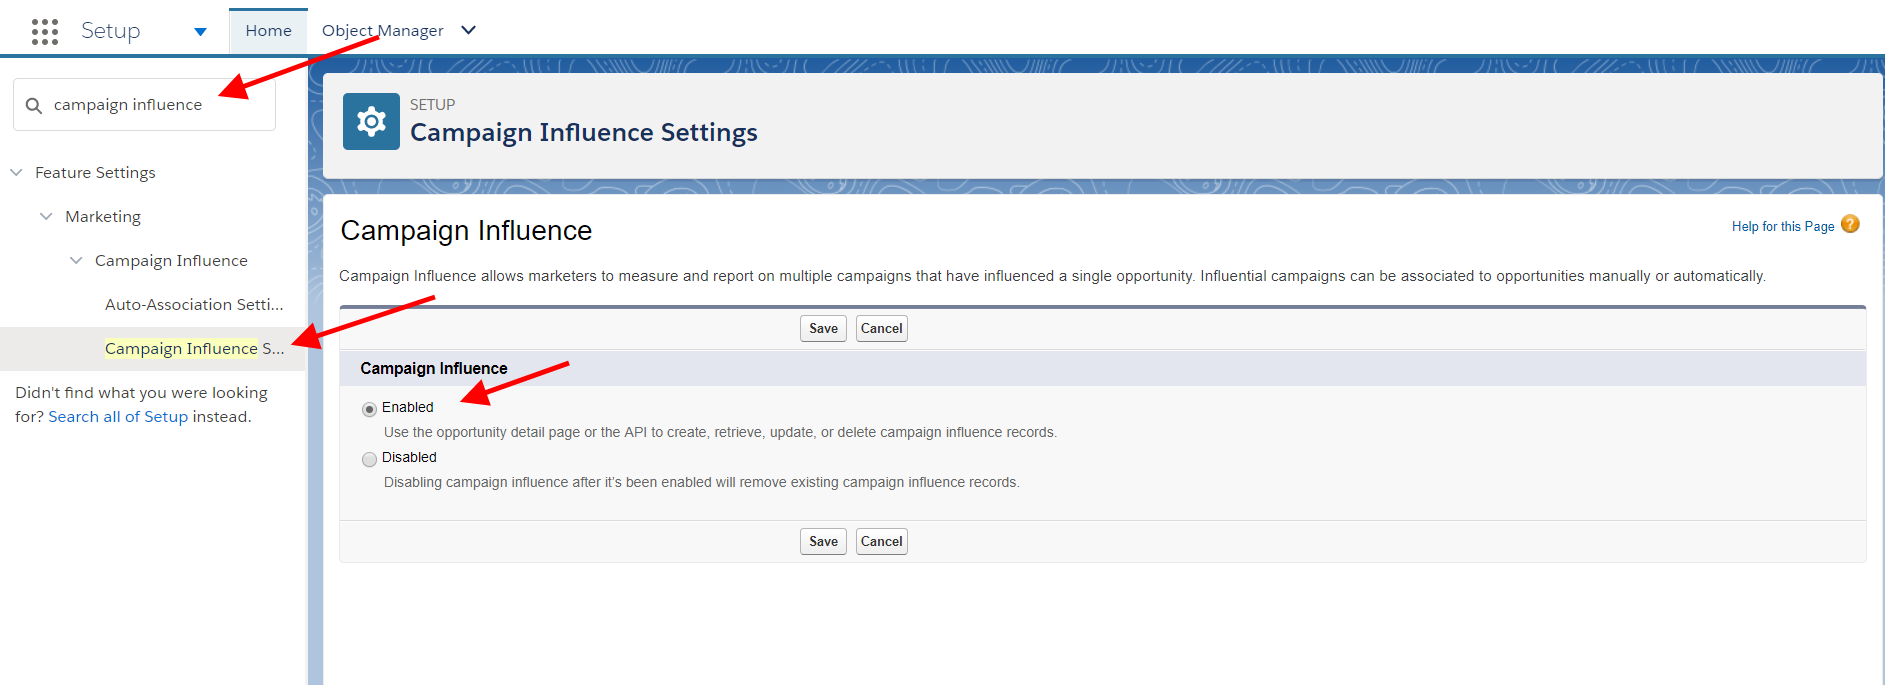
Step 2: Search then select “Campaign Influence Settings”.
Step 3: Click “Enable”.
Step 4: Click “Save”.
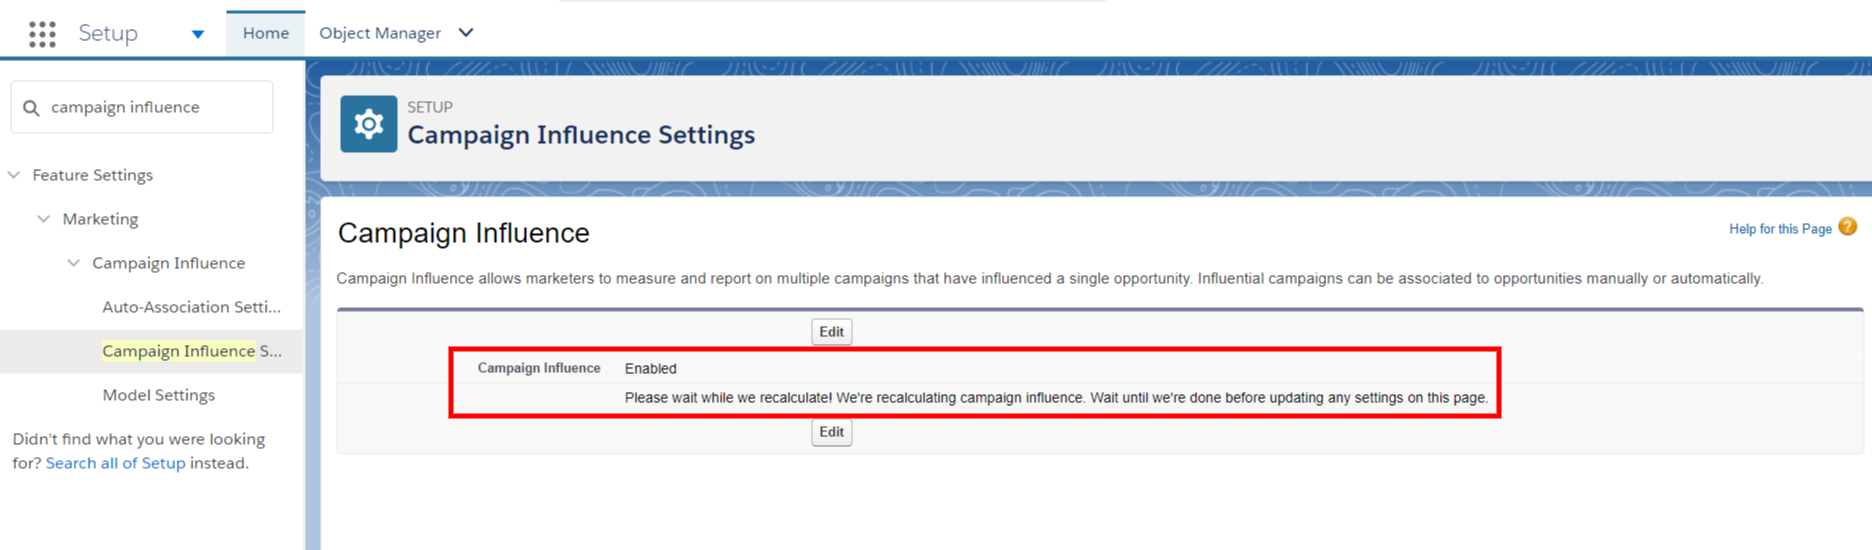
Step 5: Wait about 5 minutes. Once you’ve hit save you’ll notice this message instructing you to wait: “Please wait while we recalculate! We're recalculating campaign influence. Wait until we're done before updating any settings on this page.”
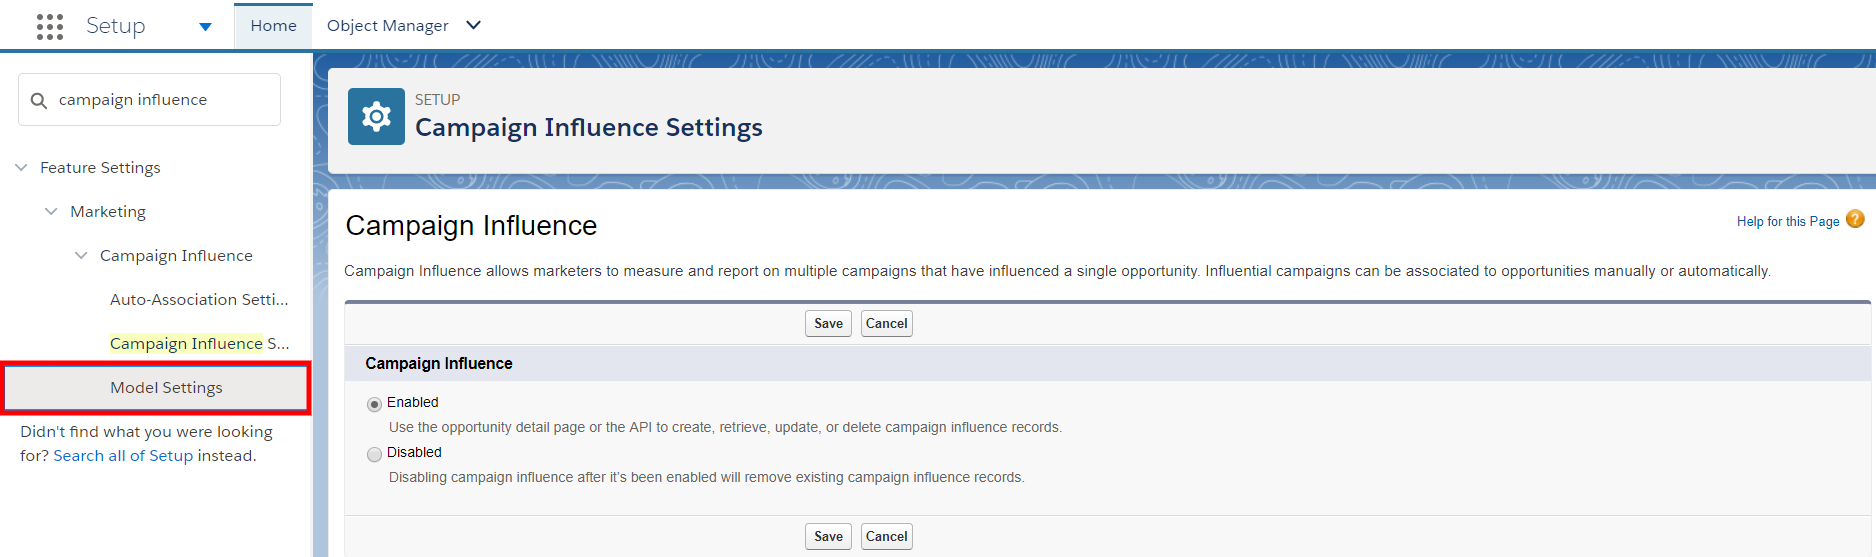
Step 6: After you’ve waited several minutes, you’ll notice several new options appear on the left menu. Click into Model Settings.

Step 7: While most of our setup is done in Lightning, at this point Salesforce automatically switched to Classic on the Campaign Influence Model Setup page. This page is where you would edit the default primary Model or create a new attribution Model. Click Edit.
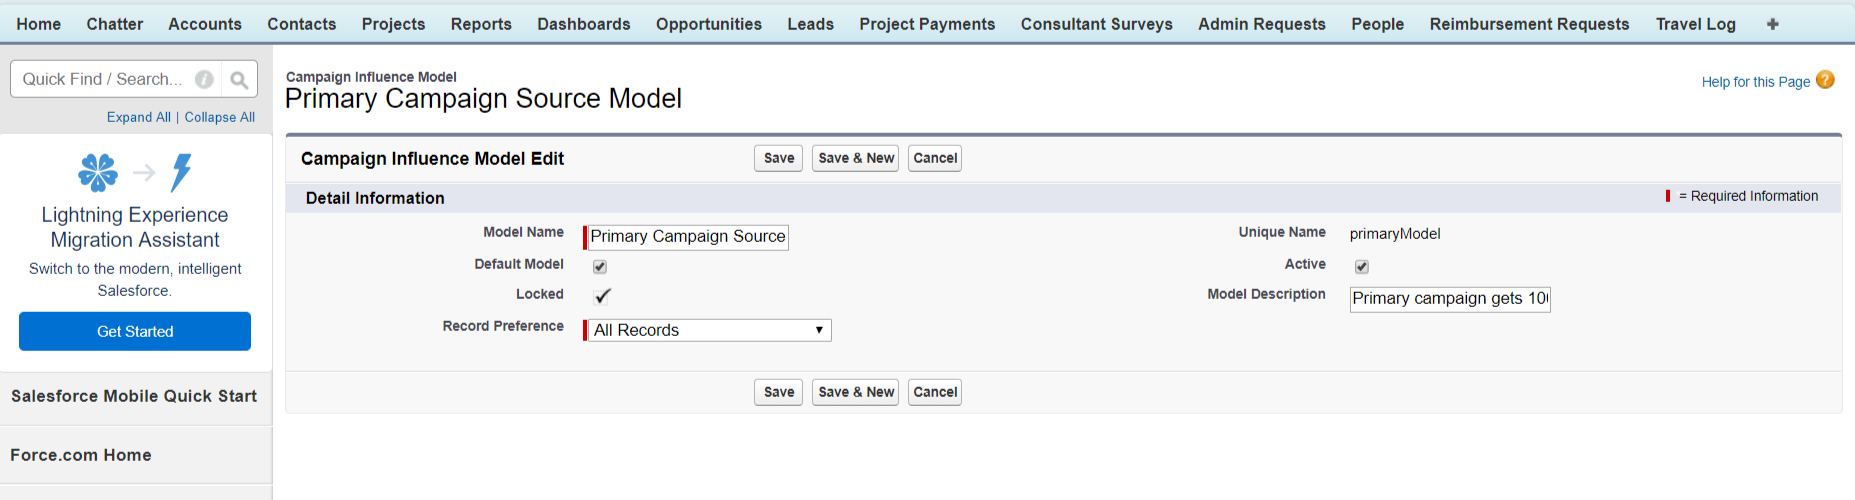
Explanations for on the terms on this page:
Default Model: Shows the model’s records in Campaign Influence related lists on campaigns, opportunities, and accounts. To set any model as the default model, it must also be active.
Locked: Restricts users from adding or updating records for the model except through the API.
Active: When the Primary Campaign Source, First Touch, Last Touch, or Even Distribution models are active, they automatically create records when there’s a match between an opportunity contact role and a campaign member (auto-association). To set any model as the default model, it must also be active.
Record Preference: Specifies whether to create all records or only when the attribution is greater than 0%. For custom models, this field is always set to All Records. If you set up a custom attribution model and want to limit it to specific records, you would need to up this record preference.
Now, on step 5 of the release notes, this is where the original instructions needed more detail. So we’re going to document what you do next.
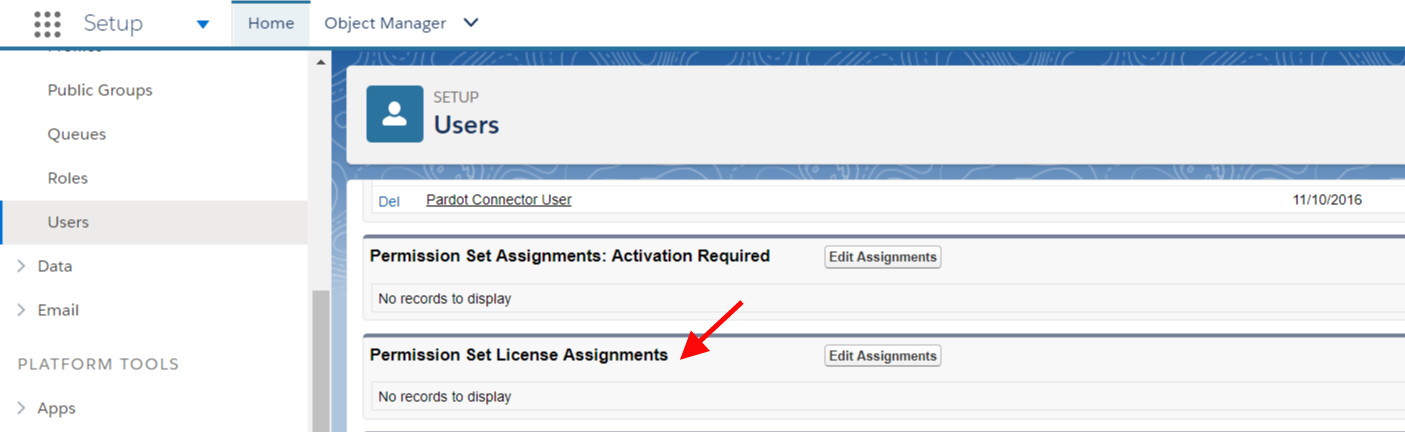
Step 8: In Setup, go to the User detail page (under the Users section) and scroll down to the Related list called Permission Set License Assignments. Click Edit Assignments.
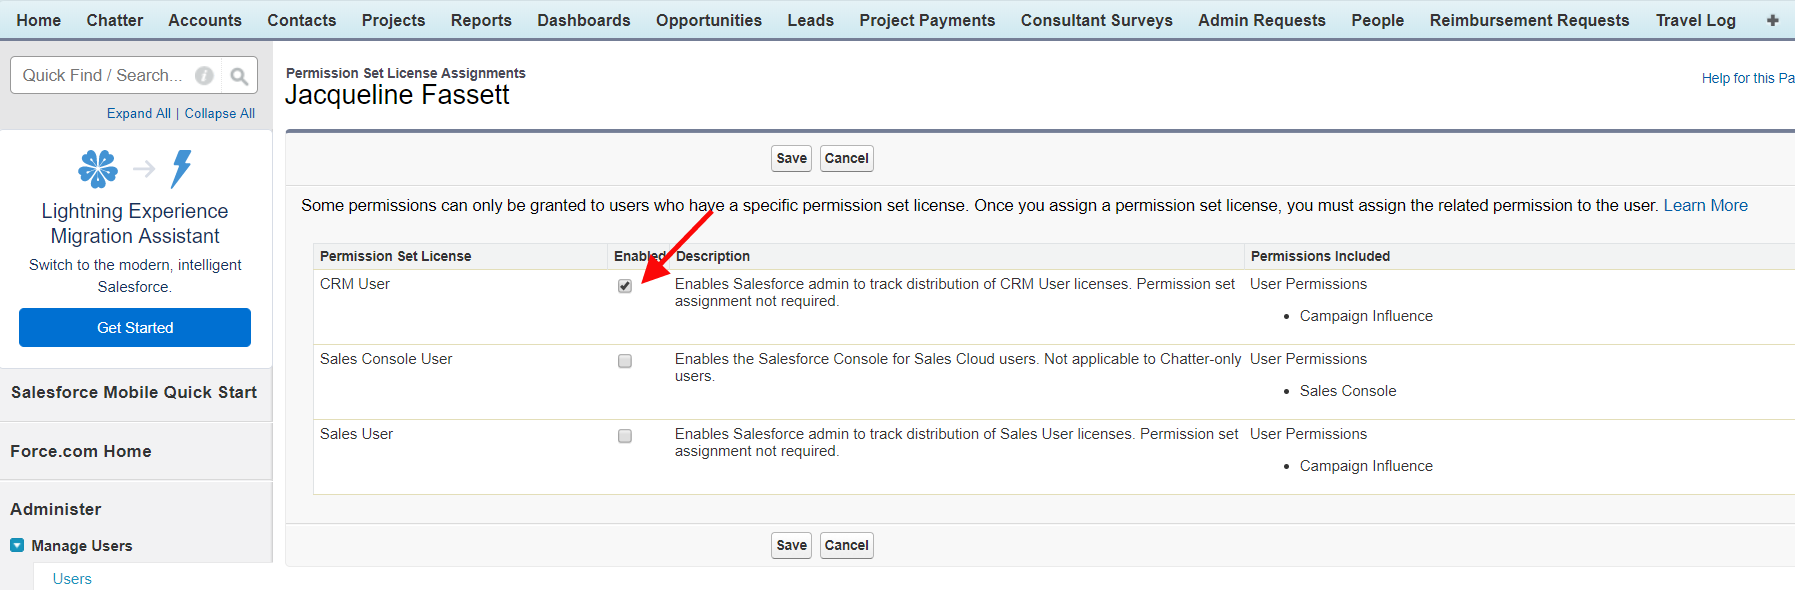
Step 9: If you’re working in Lightning, the screen will switch back to Classic here again. Click the box for CRM User to enable the permission set. Click Save.
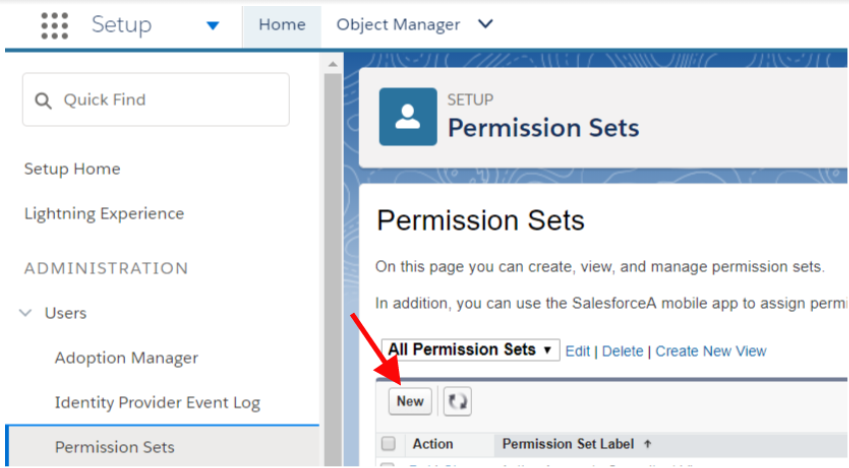
Step 10: Next, you’ll need to create a permission set with the "Campaign Influence" permission. Go to Setup, then Manage Users, then Permission Sets.

This image is from the Trailblazer Community.
Step 11: Click on New then provide the name of the label as “Campaign Influence”, then hit tab to let the API name be auto-filled. It’s best practice to enter a description so we highly recommend that here. Finally, under the Permission Set License, select Sales User. Click Save.
Step 12: Now you want to open the new permission set you just created. Check the box to enable permission "Campaign Influence" on the permission set.
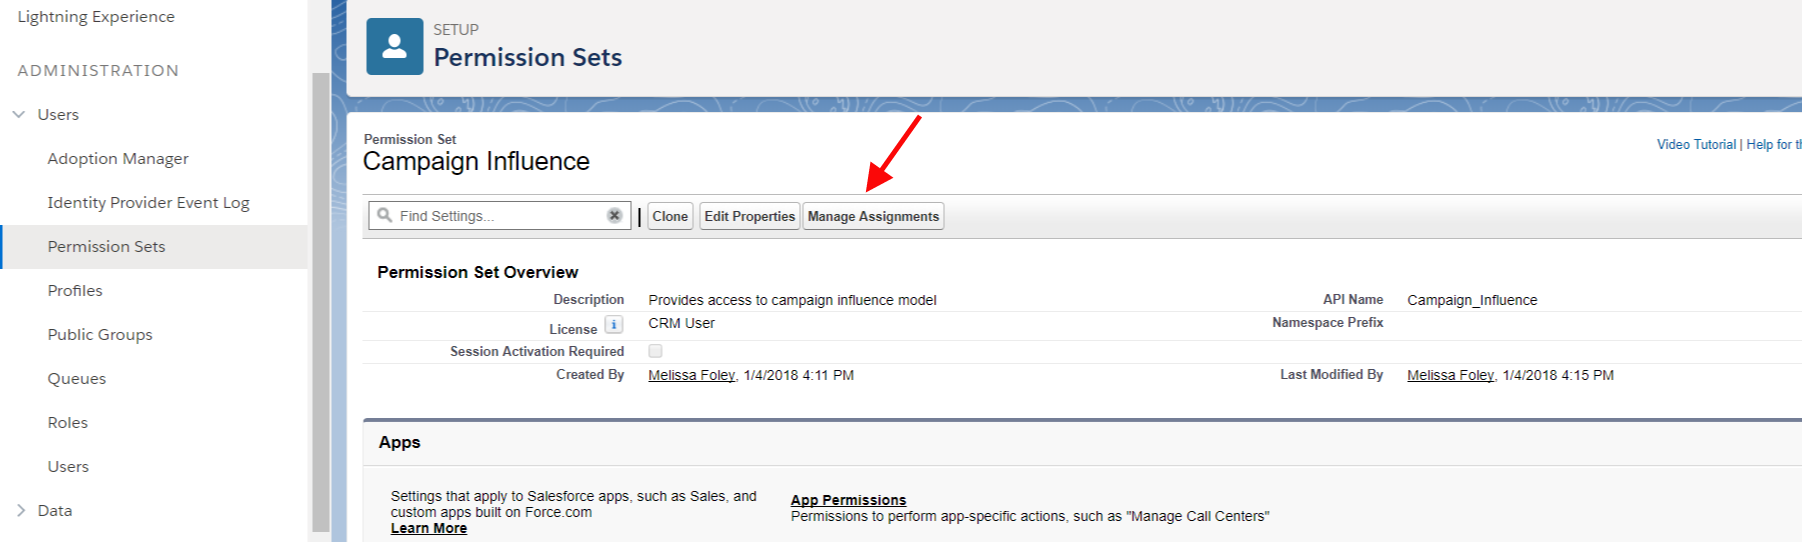
Step 13: After Enabling the Campaign Influence, click on Manage Assignment button and select the names of the users you want to have that permission set.
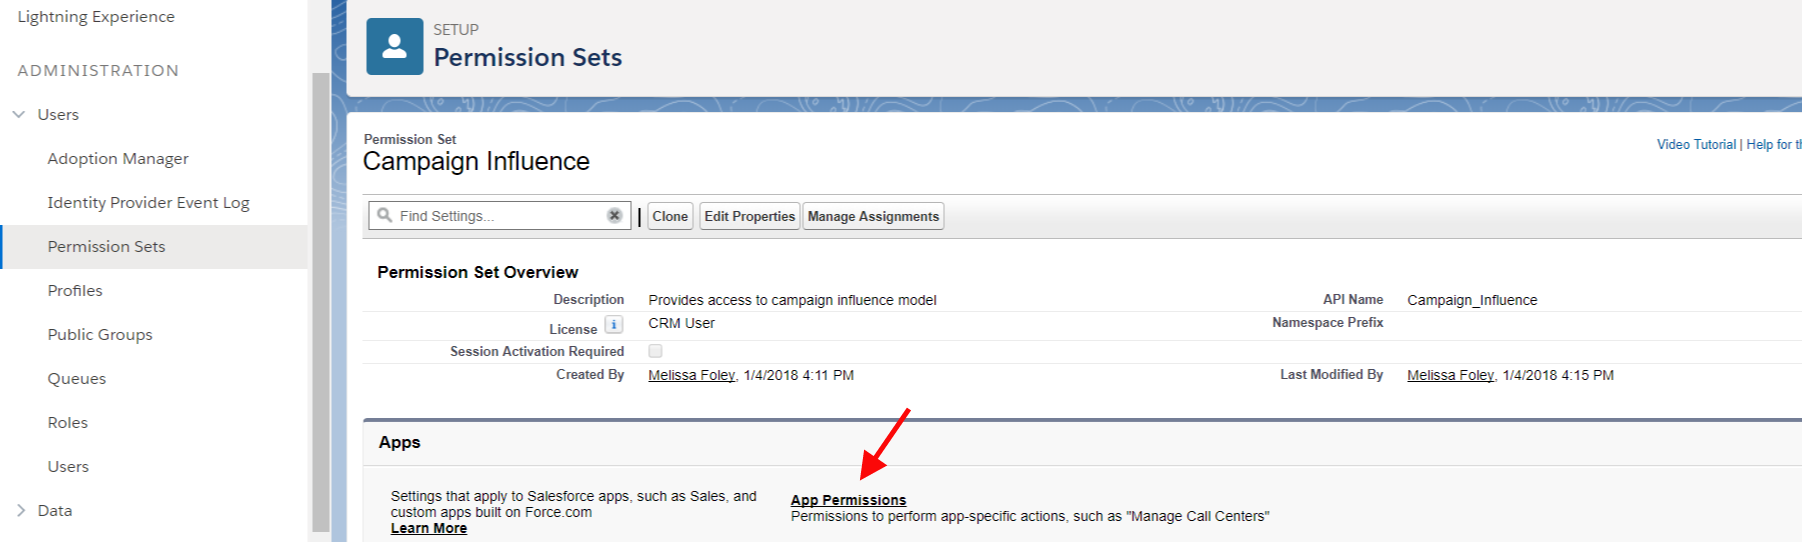
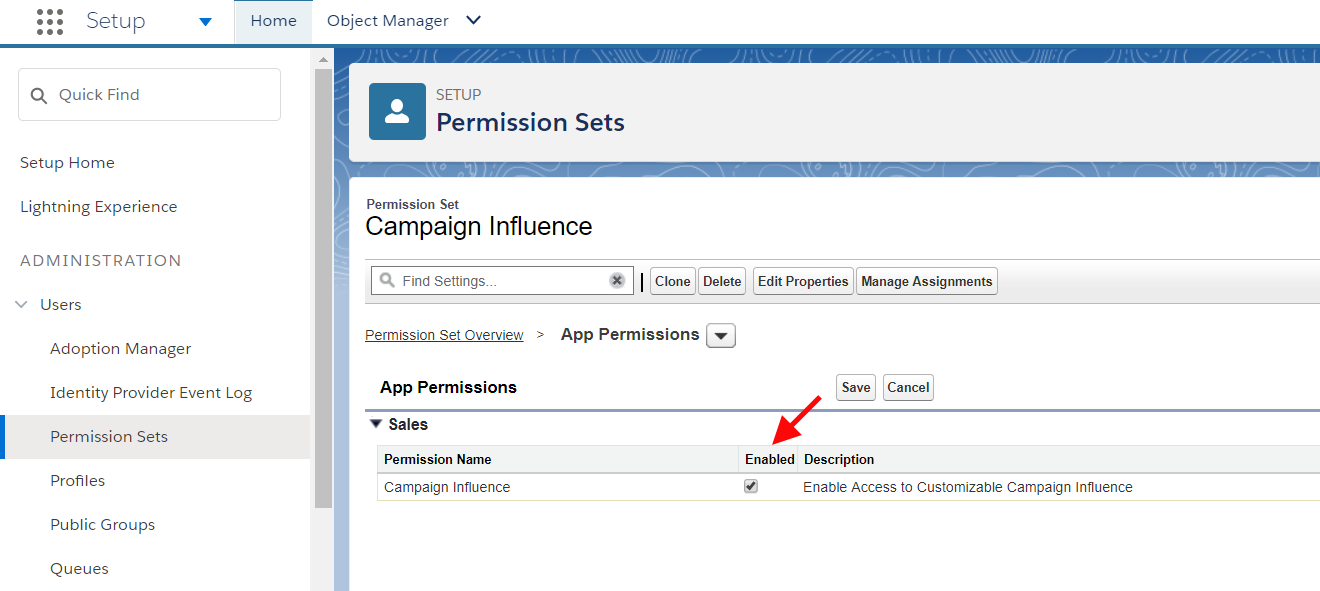
Step 14: Once you’ve created this new permission set, select App Permissions towards the bottom of the screen.
Step 15: Once in the App Permissions page, select Edit.
Step 16: Then check the Enabled box.
Step 17: Hit Save.
Step 18: From that same screen click Manage Assignments.
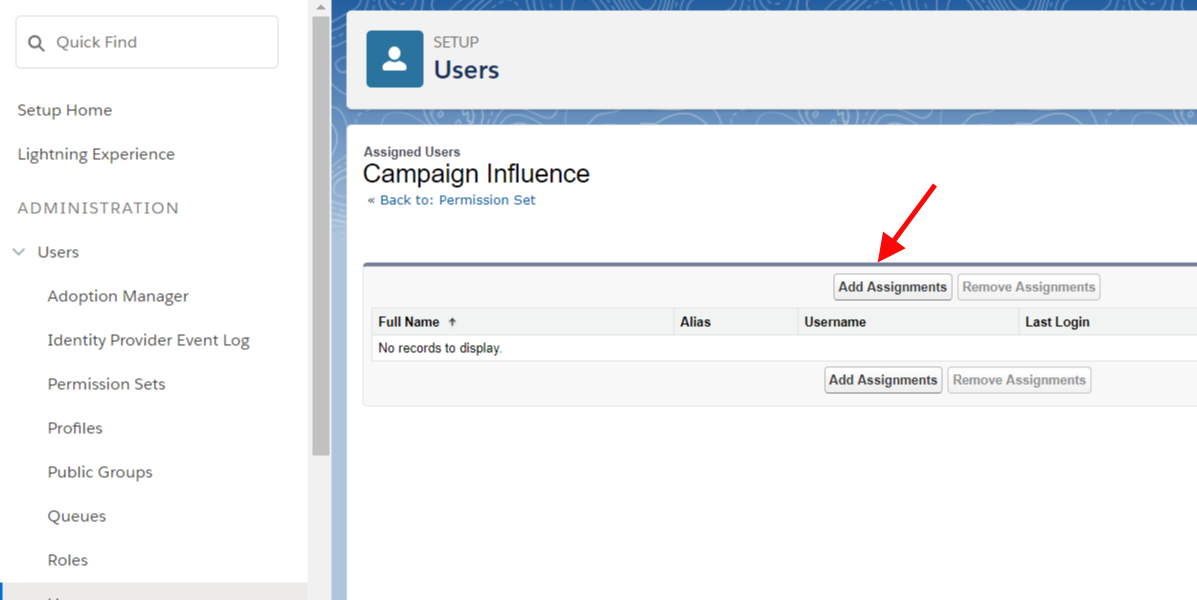
Step 19: Then select Add Assignments. Check each box for each appropriate user and then click Assign.
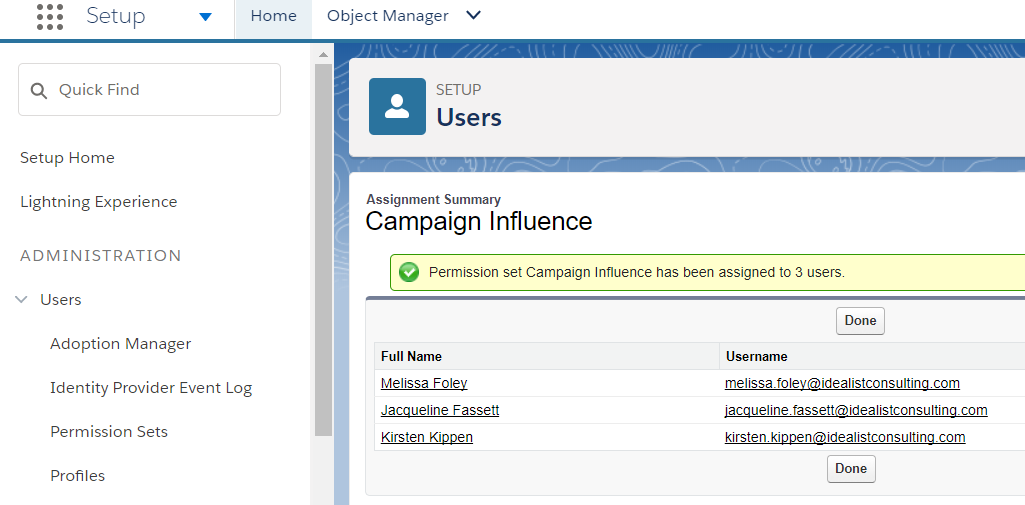
Step 20: Now that you’ve added users, you’ll see a popup alerting you to this. Click Done.
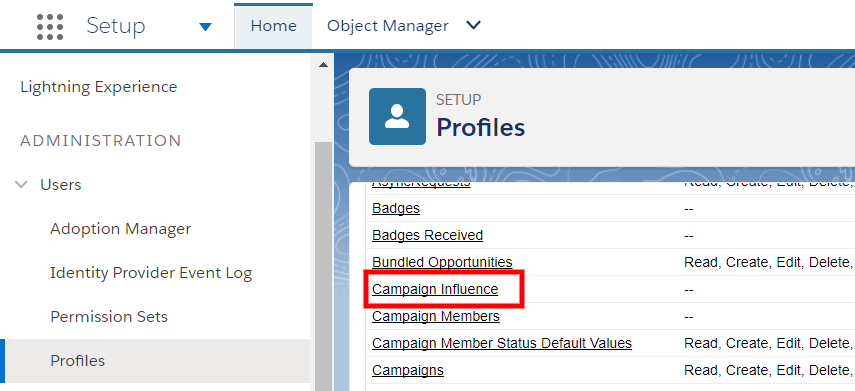
Step 21: To add the permissions under Object Settings, scroll down and click on Campaign Influence.

Step 22: Now you’ll need to add the Campaign Influence Object to the Opportunity Page Layout. Navigate to Object, then Object Manager, then Opportunities, and then Select Page Layouts on the left side.
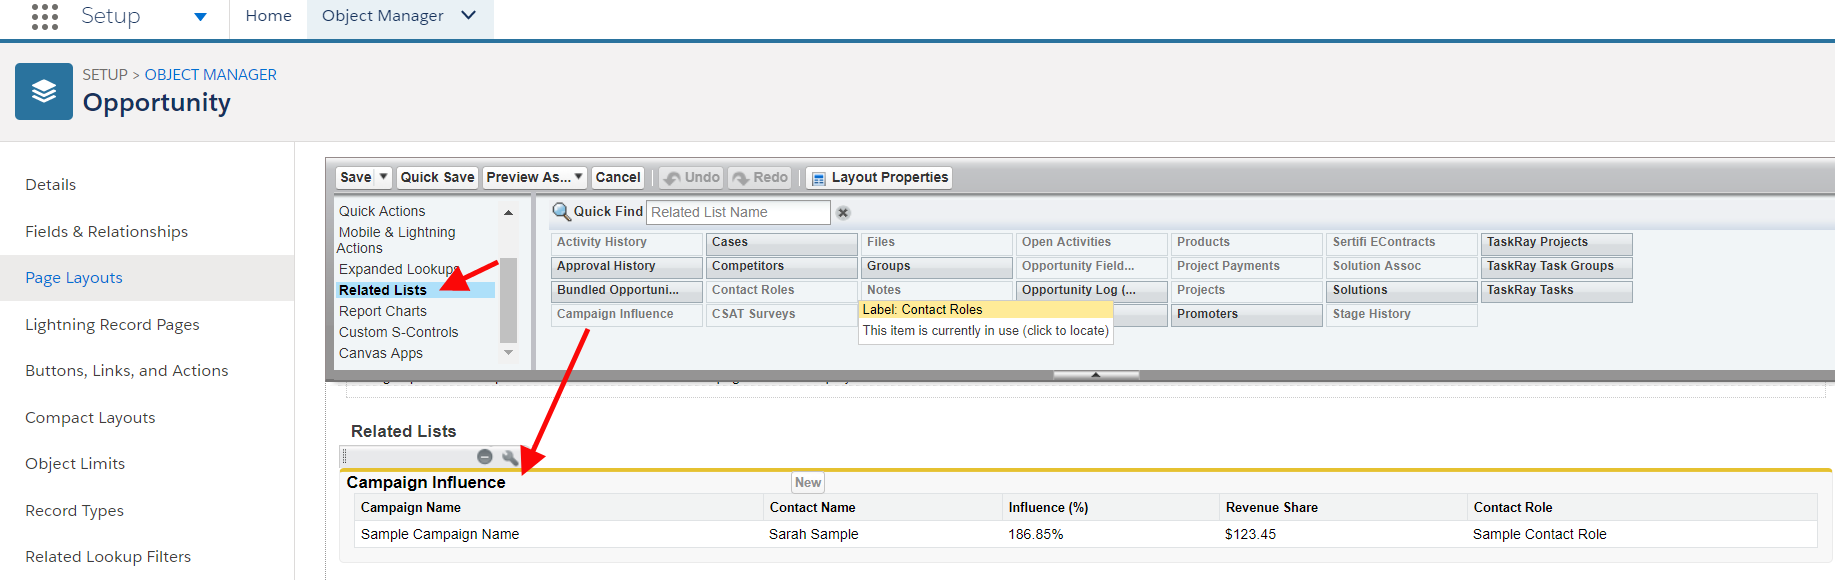
Step 23: Now you’ll need to add the Campaign Influence Related Lists to the Opportunity Page Layout. This related list shows the campaigns that have touched the opportunity. Only campaign influence records from your primary influence model appear on the list. Select Related Lists, then select Campaign Influences. Once you decide where you want the Campaign Influence Related Lists to live on the Opportunity Page Layout, drag and drop it in place.
Step 24: Hit Save.
Step 25: Next, you’ll want to add the Influenced Opportunities to the Campaign Page Layout. This related list shows the opportunities that have touched the campaign. Navigate to Setup, then Object Manager, and then Campaign.
Step 26: Next, in the Page Layouts section, select the appropriate Layout section, then select Related Lists, then select Influenced Opportunities. One thing to keep in mind is where you want the Influenced Opportunities to live on the Campaign Layout.
Step 27: Click Save.
You're done! Looking for instructions on all those cool metrics and reports you saw in the Pardot announcement? Below we've added how to get those metrics and reports set up, plus links to all the resources we used for this Campaign Influence Setup Guide.
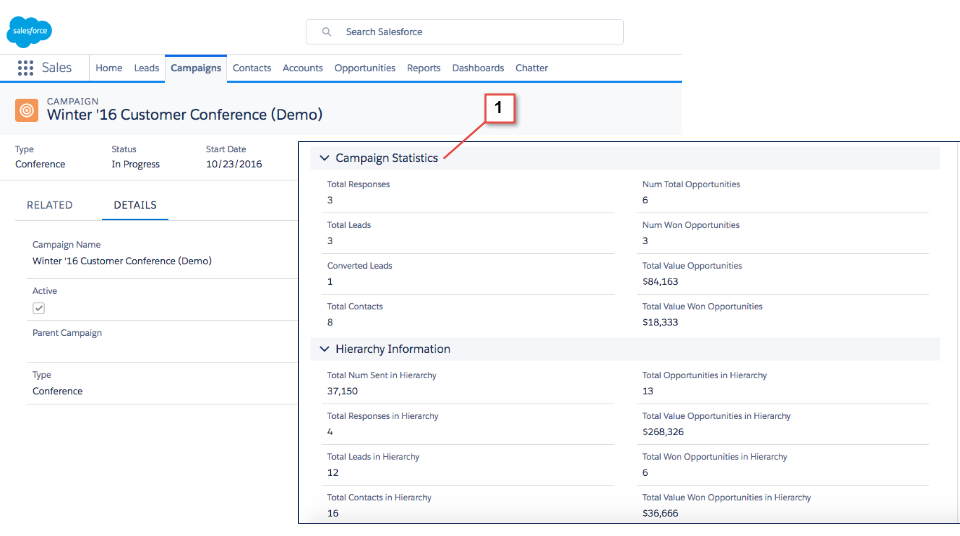
[Optional] Campaign Statistics Object:
The Campaign Statistics Object, shown in the Winter ‘17 Release Notes from Salesforce, is actually one object you can not easily drag and drop. You have to build it with Campaign Hierarchy and formula fields. You’d have to determine what metrics you want and create the fields and formulas. So this image in the documentation is not out-of-the-box.
To do this you must have Campaign Hierarchy setup. Hierarchy provides aggregate data related to the campaign. If you have a parent campaign and a subcampaign, your subcampaign data would aggregate/rollup to the main campaign.
Looking for more? Here’s the full list of all the resources and instructions we used:
-
[Pardot Blog] Introducing Pardot Campaign Influence Attribution Models
-
[Release Notes] Assign Credit for Opportunities to Multiple Campaigns with Customizable Campaign Influence (Generally Available)
-
[Release Notes] Set Up Customizable Campaign Influence
-
[Salesforce Help] Campaign Reports, comes standard from Salesforce
-
[Success Community] Campaign Influence Related list is not coming in Opportunity page layout
Additional articles on what Campaign Influence is and how to use it from Pardot bloggers:
-
[Jenna Molby's blog] How to Use Salesforce Campaigns in Pardot to Track Campaign Influence
-
[The Drip's blog] A Marketer’s Guide to Salesforce Campaign Influence
Looking for more Pardot support?
We’re building the kind of support resources we wish we’d had access to when we started on Pardot. You can sign up to get exclusive access below.